Making a Barn Quilt (I mean, Garage Quilt)

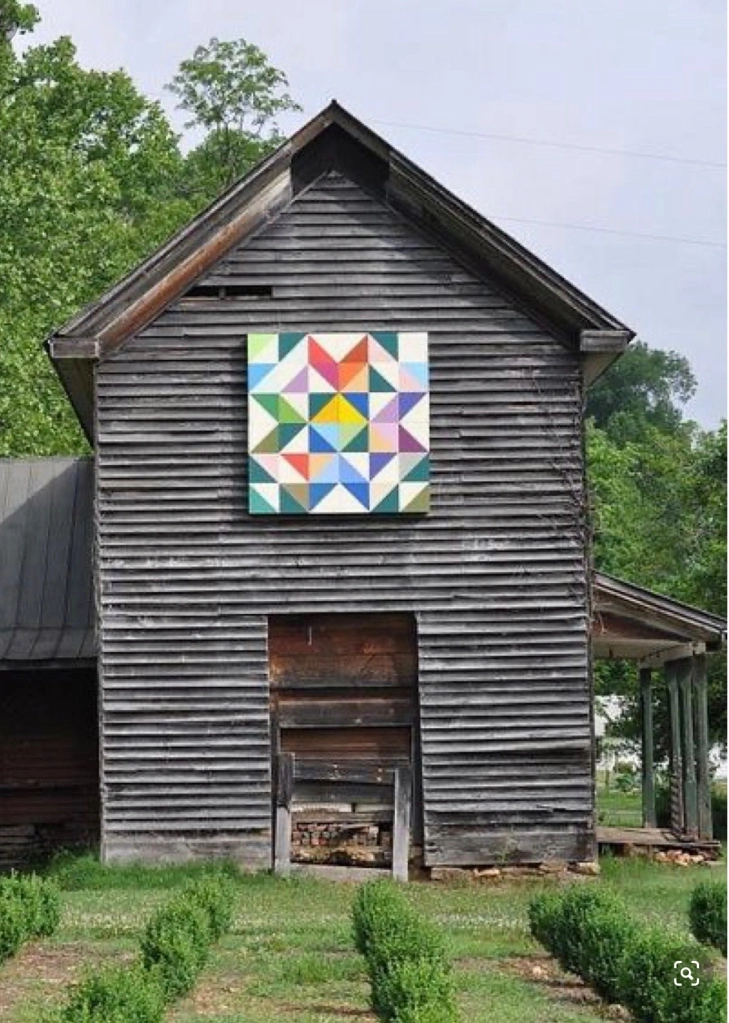
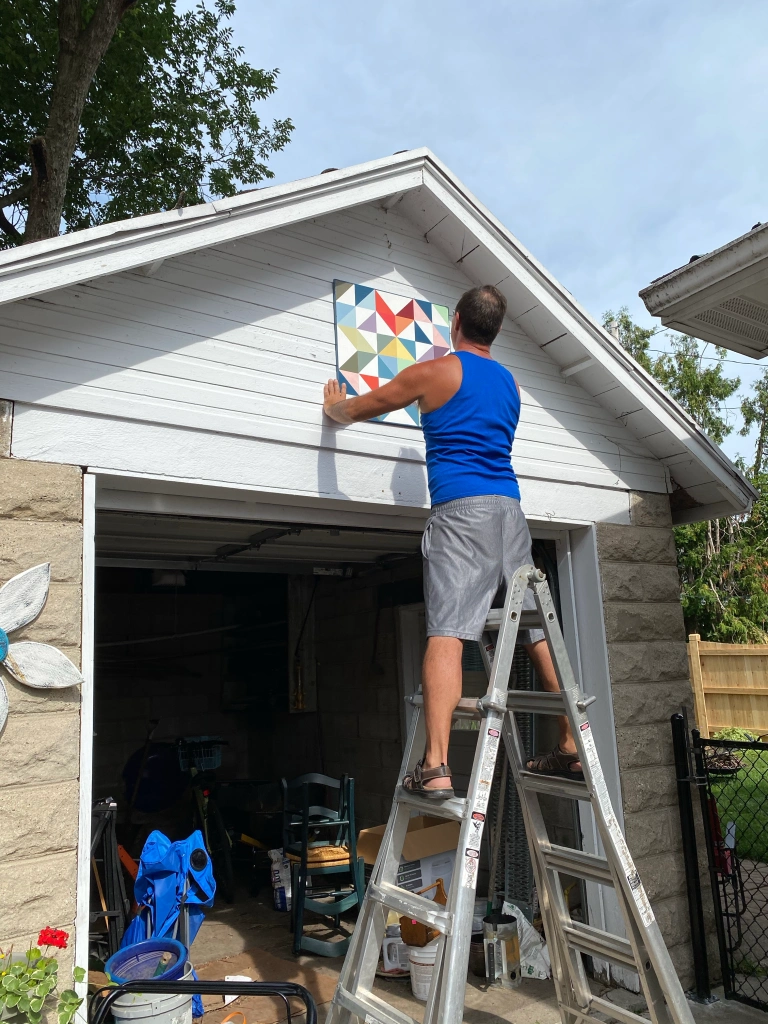
I’ve always been intrigued with the “barn quilts” I’ve seen on outdoor buildings while driving through the country. Made of wood and painted to look like a quilt square, I thought one would look perfect on my garage. In addition to looking dang cute, it would also help customers find the entrance to my quilt studio.

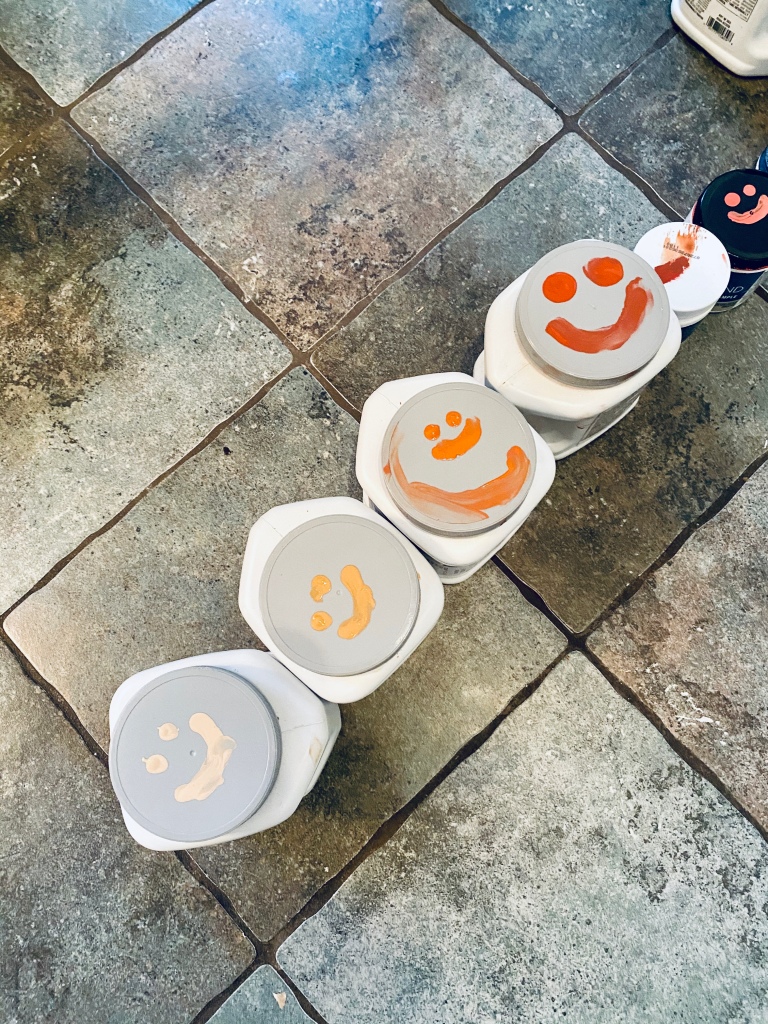
Since I’m not much of a painter, my daughter, Nora offered to help me. She may be only 16, but she’s the best darn paint mixer in the West. After searching on Pinterest, we found the perfect picture. We cracked open a couple of Bubblys, cranked the show tunes and got to work.

Step One – Sketching & Mixing

Captain Pete helped me pick out a nice square piece of pine board from Menards and we gathered all the cans of paint we could find from the basement. I really wanted to use up the paint I already had. Some was interior, some was exterior, but I planned on using a clear glaze at the end to protect it. Thankfully, I had some white left over from the front porch and used that as my base coat.

Sketching out the lines…

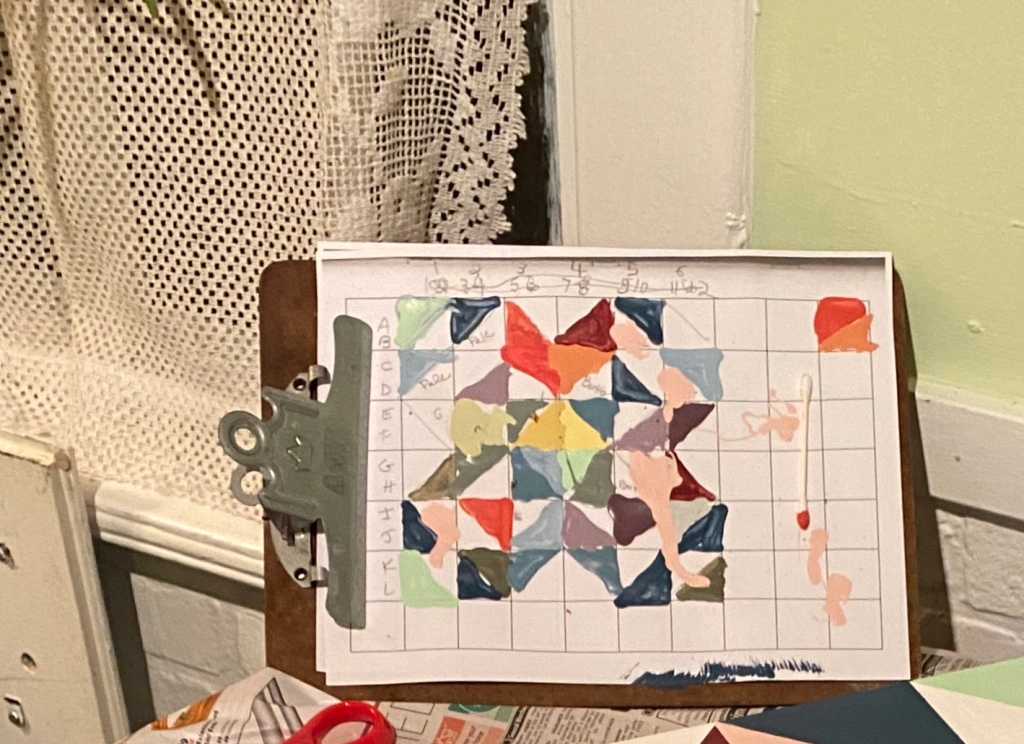
While I did the sketching, Nora started mixing paint colors. Using graph paper, I mapped out the design from the photo. From there I was able to use a yard stick and a pencil to lightly draw out the lines for our project.

Between Captain Pete’s paint stash and my paint stash, we had over 25 colors. Why go buy more?!
Nora went through all the paint and marked the covers with smiley faces to keep track of the colors.
This creative gal worked her magic and mixed the colors to match the picture. I am amazed that she was able to even get the purples! (We needed Reese’s Pieces for sustenance.)

Step Two: Painting and waiting…

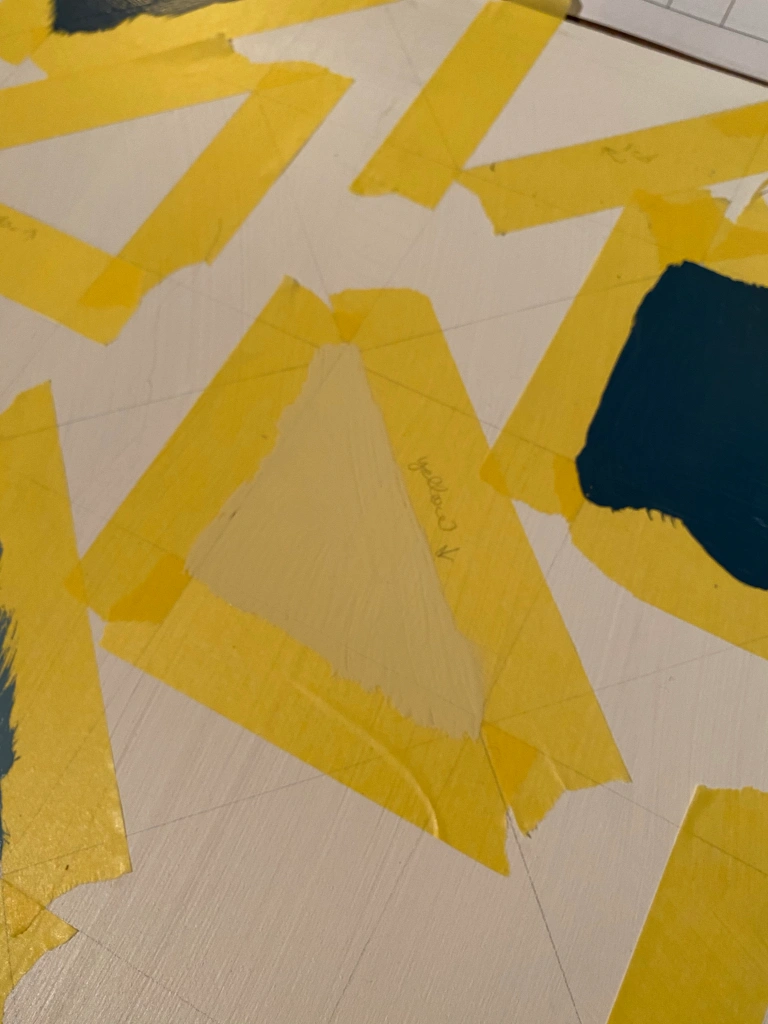
Using the map guide we drew up, we began taping off the lines and painting in the triangles. I highly suggest using Frog Tape painter’s tape. It’s really the best to prevent bleeding.

The messy color map guide.
Can you believe these colorful paint creations? Nora sure has an eye for mixing paint colors!

Using the pencil lines, we taped off sections. The waiting really was annoying, but gave us time to dance, sing and have snacks.

We marked the colors on the tape so not to get confused.
This hairdryer helped speed up the drying process.

Step Three: Stand back and Enjoy!

We did it!
Captain Pete helped with the hanging.
Finished project!

Hope this inspires you to be creative! Check out all my Artfully Sew quilting and sewing designs on Facebook or Instagram. I’d be happy to help you with your next project!

Creatively transforming your fabrics and quilts into artfully sewn treasures

Doodling with thread – embroidery stitches

I love to doodle with thread! Although this project isn’t finished yet, I wanted to share my progress so far. Experimenting with various embroidery stitches on this appliqued heart was very fun. Now off to add the verse and more embroidery doodles.

image

Doodling with embroidery thread by Angela Jean of Artfully Sew

Artfully sewing,

Angela Jean

Walk by Faith Sketch for Art Quilt

image

This image has been tickling my imagination for a long while. I finally got to sketch it out on paper today and will soon turn it into an art quilt. I was inspired by Hebrews 11:1, “Faith is being sure of what we hope for and certain of what we do not see.”.  I like to picture myself guided by God with my eyes closed, resting and trusting in Him guiding me.

Off to pick out fabrics!

Artfully sewing,

Angela Jean

Using Hand-Dyed Fabric like Paints

fabric color wheel

I think I’m the luckiest quilter in the world. My best friend’s mother has an addiction to dying fabric. She gave me all of these hand-dyed “scraps”. Yes, I used the verb, GAVE. I feel like a kid with a new box of crayons!

03293-dressmakeover04

When she gave them to me they were in various bags, folded in different ways. I had the best time sorting them by color using one of my favorite tools, the Ultimate 3 in 1 Color Tool. I use it all the time to match my colors both for fabric and embroidery thread.  I used this tool to make this wall quilt of my precious little cockatiel, Sammy.

I started with a photo of Sammy. I printed it out in black and white on my printer. To get his shape for the fabrics, I turned the photocopy over on my light board and traced simple shapes of his eye, cheek patch, gray and yellow feathers.

2011-08-02 08.44.42

I then traced the shapes onto fusible webbing. I have found the best webbing for machine and hand stitching is Pellon Wonder Under 805. Good stuff. I cut out the shapes and matched hand-dyed fabrics to Sammy’s coloring.

I picked found scraps from a previous project to be the background and fused him to it.

2012-11-15 21.52.25

Then, my favorite part. Thread painting! I added stabilizer to the quilt top and stitched using thread colors that would match Sammy’s feathers and added contrast and depth.

20121117_145826

Voila! A finished Sammy art quilt.

Now off to discover what else will come from my rainbow of fabrics!

Artfully sewing,

Angela Jean

Quilt in Process…

I’ve been going through my ufos (un-finished objects). I found this quilt top I pieced a couple years ago. Poor thing has been sitting in a box on my top shelf. So I blew off the dust and unpacked it.  I’m determinded to finish it and bring it back to life.

Image

The colors are great, but to make it more appealing, I’ve decided to add a boarder using white fabric with embroidered flowers.  I love doing hand embroidery! Thankfully, I kept the extra fabric in the box, so I was able to use coordinating fabrics.  So far, so good…

Image

I can’t wait to show you the finished project, especially since the last photo is kinda fuzzy.  I’m hoping to have it ready to quilt by the end of the weekend.  Quilting is my favorite part, so yippee!

Image

What quilting goals do you have for the following week?  Do you have any nagging ufos on your shelf? Post your goals below and we can hold each other accountable.

Artfully sewing,

Angela Jean